Choosing Double Cut Carbide Burs starts with the job, not the widest catalog or the most aggressive-looking shape. These rotary tools use crossed cutting flutes to remove material while helping produce a more controlled finish than many single-cut designs. Their performance still depends on matching the burr to the material, tool, and task.
Consider what you need to remove. Aluminum can load the flutes, while harder alloys may demand a different shape, pressure, and speed. Match the burr’s diameter and head profile to the work area: a small cylinder can reach a narrow recess, while a ball shape suits curved surfaces. Check the shank size and your rotary tool’s rated speed before fitting any burr. A mismatch matters.
Control matters, too. Let the cutting edges do the work; pressing hard can increase heat, wear, and the chance of chatter. Keep the workpiece secure, use suitable eye protection, and follow the tool maker’s operating guidance. There is no perfect burr for every task. In a real workshop, access and finish requirements sometimes point in different directions. That trade-off deserves a second look.
This guide explains how to compare cut style, shape, size, and material compatibility before buying. It also covers common selection mistakes, such as choosing a large head for a tight corner or assuming one speed suits every alloy. A careful match can make material removal steadier and more predictable. Results still depend on technique, equipment condition, and the workpiece itself.
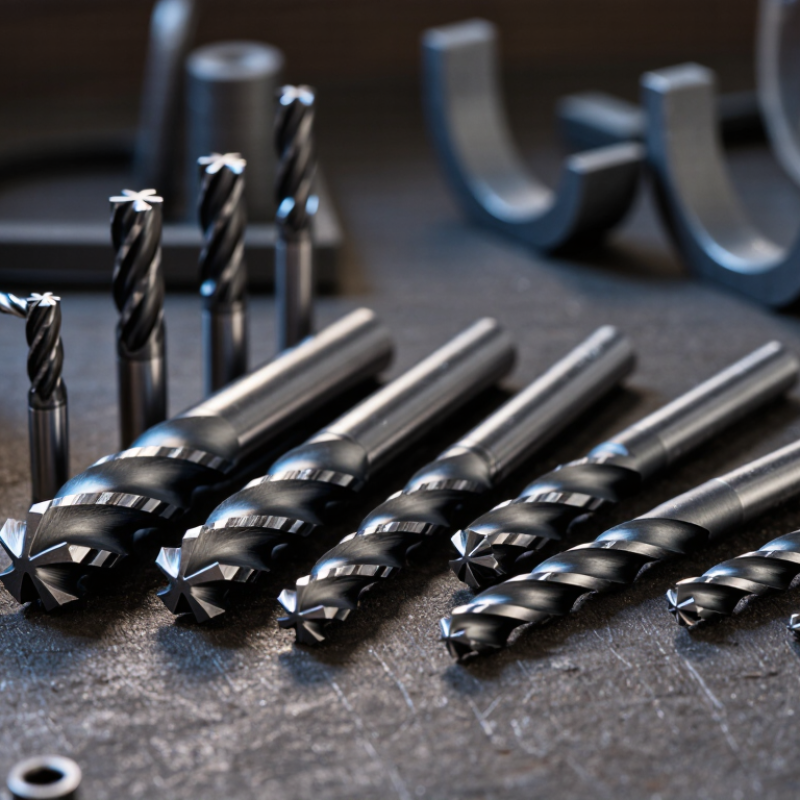
A double-cut carbide bur has two sets of flutes crossing along its cutting head. As the bur rotates, these edges break material into smaller chips than a comparable single-cut design. This often gives the operator better control and a more even feel, especially when shaping steel or removing weld material. Small details matter. Tooth spacing, head shape, and bur diameter all affect how the tool behaves. A double cut does not guarantee a smooth finish; pressure, speed, and workpiece hardness matter too.
Choose the head shape to match the task: a cylindrical bur can reach narrow slots, while a rounded tree shape suits curved surfaces. Match the bur’s diameter and shank to the tool, and follow the tool maker’s speed guidance. It is tempting to press harder when cutting feels slow, but that can create excess heat and wear the teeth. Use light, steady passes, secure the workpiece, and wear eye protection. On soft, gummy materials, chips can still pack between the flutes. Test on a scrap piece first; the result may differ from what the shape suggests.
Start with the workpiece, not the burr catalog. ISO 513:2012 groups cutting applications into six material categories: steel, stainless steel, cast iron, non-ferrous metals, heat-resistant alloys, and hardened materials. This classification is a useful first check because hardness, toughness, and chip behavior affect how a double-cut carbide burr performs. Cross-cut flutes often give better control on steel and cast iron, while soft aluminum can load the teeth quickly. The rule is useful, but not perfect; alloy and heat treatment matter too.
Next, match the burr shape to the surface you need to reach. A cylindrical burr suits flat faces and straight slots. A ball nose can follow a concave pocket, while a tree shape reaches corners and curved transitions. Picture a narrow groove in a steel bracket: a slim cylinder may fit, but its tip must also clear the groove’s end. Choosing by shape alone can leave scratches or remove too much material.
Tips: Check the workpiece alloy and the burr’s cutting diameter before starting. Test on scrap when possible. Keep the burr moving; pausing in one spot can create heat and uneven marks.
The bur’s shape should match the surface you need to reach, not simply the material. A cylindrical bur with a flat end suits flat areas, narrow slots, and square shoulders. Use a ball shape for curved cavities or rounded transitions. Oval and flame shapes help blend edges and follow contours, while pointed tree shapes can reach into corners. Check the head diameter against the opening; a bur that barely fits may leave uneven marks.
The double-cut pattern uses crossing flutes to break material into smaller chips and support controlled stock removal. It can feel steadier than a single-cut pattern on many hard metals, but pressure, speed, and tool rigidity still matter. Let the cutting edges do the work. Too much force can cause chatter, heat, or a rough finish. On softer or gummy materials, chips may pack into the flutes, so pause and inspect rather than pushing harder.
Start gently. Make a short test pass on a similar offcut, then check the cut and the bur for loading or wear. A smaller head may improve access, but it can also remove material quickly in a tight area. There is no perfect shape for every job; the best choice depends on reach, finish, and how much control the task allows. Small details matter.
Start with the work area, not the catalog number. A narrow, tapered bur can reach a recessed corner, while a larger head covers broad surfaces faster. Match the cutting head to the feature you need to shape, leaving enough clearance to see the contact point. If the bur is too large, its edge may catch nearby material; too small, and the job can become slow and uneven.
Diameter also affects operating speed. At the same RPM, a larger bur moves faster at its edge and generally calls for a lower RPM. Use the operating range supplied for that specific bur and rotary tool, and stay below the lowest stated limit. There is no universal number. Begin within the recommended range, then adjust only if the cut remains smooth and the tool stable.
Listen and look. Chatter, heat, or a sudden change in sound may signal excessive pressure, a dull bur, or unsuitable speed. Ease off and inspect the setup rather than forcing the cut. Keep the shank fully seated, use eye protection, and avoid bending the bur sideways. The right size can be less obvious than it seems; a brief test on scrap may reveal poor access or vibration before the finished piece is marked.
Before choosing a double cut carbide bur, check that its shank fits the tool’s collet and that the bur’s rated speed suits the machine. A poor fit can cause vibration, uneven cutting, or a loose bur. Fit matters. Compare the bur’s diameter and cutting-head shape with the space you need to reach. For example, a narrow head may work inside a small groove, while a wider one removes material faster from an open surface. Check the material guidance, too; carbide burs are not equally suitable for every workpiece. It is easy to focus on cutting feel and overlook the tool’s speed rating.
Use eye protection, secure the workpiece, and keep your hands clear of the rotating head. Let the bur cut without forcing it; excess pressure can increase heat and shorten tool life. Stop if you notice unusual vibration, a damaged cutting edge, or a change in sound. No guesswork. After use, remove debris with a suitable brush and inspect the bur under good lighting. Store it so the cutting edges do not strike other tools. Maintenance takes a little time, and it can still be tempting to skip it. But a worn or dirty bur may cut unpredictably, so replace it when cleaning no longer restores its performance.
Identify the material first. Steel, stainless steel, cast iron, non-ferrous metals, heat-resistant alloys, and hardened materials can cut differently. Alloy and heat treatment matter too.
A cylindrical burr with a flat end suits flat faces, narrow slots, and square shoulders. Check that its tip can reach the end of the slot.
A ball shape follows curved cavities. Oval or flame shapes blend edges, while a pointed tree shape can reach corners. Fit matters.
Crossing flutes break material into smaller chips and can help control stock removal. They may feel steadier on hard metals, but results depend on the setup.
Not reliably. Soft aluminum can load the teeth quickly. Pause to inspect the flutes instead of pushing harder.
Use light pressure and keep the burr moving. Too much force can cause chatter, heat, or a rough finish. Small test passes help.
Compare its cutting diameter with the opening. A head that barely fits may leave uneven marks or remove too much material.
When possible, make a short pass on a similar offcut. Check the cut and the burr for loading or wear. It is not foolproof.
Choosing the right Double Cut Carbide Burs starts with understanding how their cutting design affects material removal, control, and surface finish. Consider the workpiece material, its hardness, and its shape before selecting a bur. Different shapes are suited to different tasks, such as reaching narrow areas, working on curved surfaces, or removing material from a flat section. Matching the bur’s shape and cut pattern to the job can help achieve a more controlled and consistent result.
Next, select a bur size and operating speed appropriate for the workpiece and the level of detail required. Confirm that the bur is compatible with your tool, and follow the tool and bur manufacturers’ operating guidance. Before use, check the bur for damage and secure it correctly. Clean and store it properly after use, and replace it when worn. These considerations support safer handling, dependable performance, and a suitable finish for your project.