Choosing a countersink is not just a matter of picking the sharpest-looking tool. When clean, repeatable screw seats matter, Carbide Tipped Stop Countersinks can help control cutting depth while resisting wear on demanding materials. The stop feature is useful. But it does not guarantee a perfect result.
This guide to the 7 Best Carbide Tipped Stop Countersinks for Buyers focuses on details that affect real shop work: stop adjustment, pilot size, shank compatibility, cutting geometry, and replacement-part availability. A countersink used on a small cabinet panel may need a different setup from one used on a metal fixture. Check the tool’s stated material range and match its pilot to the drilled hole. A mismatch can cause chatter, uneven seating, or a frustratingly rough finish.
We also consider how easily each design can be set and locked, since a stop that shifts during use can spoil consistent results. Clear product specifications matter more than broad claims about durability. Where details are limited, buyers should confirm dimensions and intended use with the manufacturer. That extra check takes time. It can prevent a tool from arriving with the wrong pilot or shank.
No single model suits every bench, material, or production pace. A compact tool may be easier to handle, while a sturdier setup may feel more stable in repeated work. This comparison offers practical points to weigh before buying, while recognizing that setup and operator technique still matter.
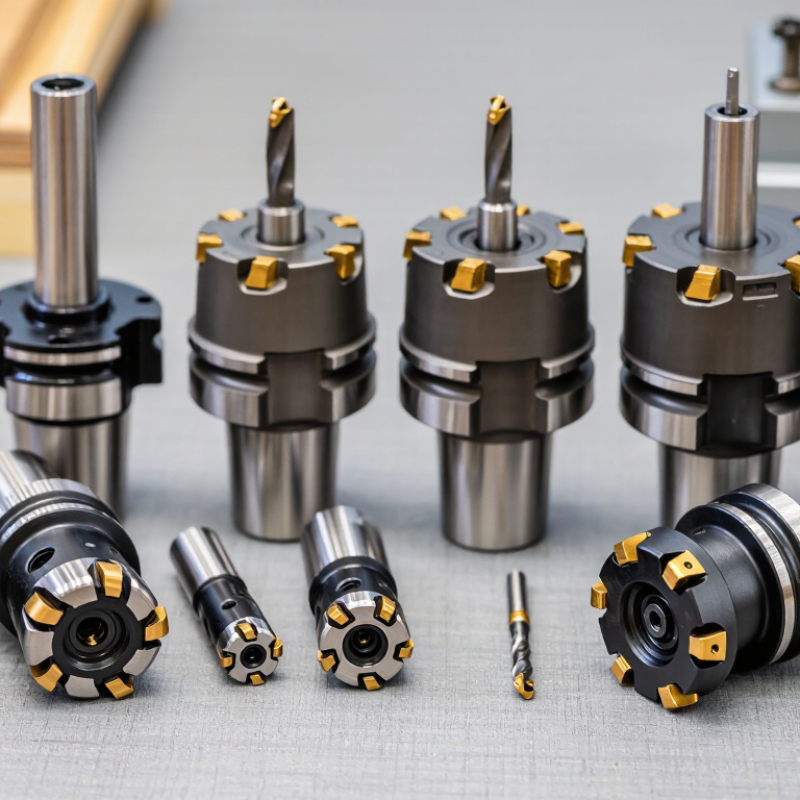
A carbide-tipped stop countersink cuts a conical recess around a pilot hole, helping a flat-head screw sit flush or slightly below the surface. The carbide cutting edge resists wear during repeated work, while the stop limits how deep the tool cuts. That matters. A consistent recess can improve fit across a row of cabinet panels or a small production batch.
The stop may be adjustable, so check how it locks before drilling. Set the depth on a scrap piece made from the same material, then inspect the screw head against the surface. A stop controls depth, but it cannot correct a mismatched countersink angle or pilot-hole size. Those details depend on the fastener and tool design. Read the tool’s specifications rather than assuming all countersinks suit the same screws.
For buyers, consider the work material, expected use, and whether replacement pilots or cutting parts are available. Carbide tips can be durable, but they may chip if dropped or forced through a poorly aligned hole. It is easy to focus on tip life and overlook setup. I would check adjustment and alignment each time; that extra habit can feel fussy, but inconsistent depth is frustrating to fix.
A stop countersink shapes a screw seat while limiting how deep the cutter enters the workpiece. Its carbide-tipped cutting edges create a conical recess, and the pilot helps keep that recess centered over the drilled hole. The stop collar contacts the surface at a preset point, so the tool cannot keep cutting freely. Small changes matter. A seat that is too shallow may leave the screw head proud; one that is too deep can weaken the surrounding material.
For consistent results, match the countersink angle and pilot diameter to the fastener and existing hole. Set the stop on a scrap piece of the same material, then inspect the screw’s fit before working on the finished part. A thin marker line around the collar can help reveal whether it is rubbing evenly. Keep the tool square to the surface, and clear chips often; packed debris can affect both the cut and the stop’s contact. Carbide edges resist wear, but they are not immune to chipping, especially if the tool chatters. This is easy to overlook. When comparing stop countersinks, check that the collar adjusts securely and that replacement pilots or cutters are available. A depth stop improves repeatability, though setup still deserves a careful check.
When comparing carbide-tipped stop countersinks, check the included angle against the fastener head and the drawing. A mismatch can leave a proud screw or remove too much material. Look at the stop mechanism, too: a stable collar should limit depth without shifting under light pressure. Small details matter. Check whether the stop adjusts easily and locks firmly, especially when several holes must match.
Match the cutting geometry to the workpiece and machine. Carbide can resist wear, but it is not immune to chipping, so rigid setup and sensible feed rates still matter. Review shank size, flute count, and stated countersink diameter for compatibility with your holder and hole pattern. Then inspect runout and edge quality, if samples or measurements are available. Test on scrap. A catalog description rarely shows how smoothly a tool clears chips or how clean the seat looks in your material. That uncertainty is worth accounting for. Compare replacement-tip availability and the maker’s cutting guidance, not just the purchase price.
Carbide-tipped stop countersinks vary in how they control depth and clear chips. A fixed-stop design suits repeat jobs when every screw seat needs the same depth. An adjustable collar offers more flexibility across different material thicknesses, but it must be locked carefully. A spring-loaded stop can feel smoother on a production bench; test its travel before relying on it. Small differences matter.
Guided designs help keep the cutter centered over a pilot hole, especially on visible work. Single-flute cutters often clear chips cleanly and can leave a neat seat at a controlled feed. Multi-flute versions may cut more evenly, though they can clog if chips pack into the flutes.
A replaceable-cutter model can reduce downtime, while a compact one-piece tool is simpler to handle. For abrasive composite or hard stock, carbide tips can retain an edge longer than many standard tool-steel cutters, but they are not immune to chipping. Match the cutter angle and stop setting to the fastener and material.
Check the first few holes with a depth gauge or sample screw. I still find stop collars can mark soft surfaces, so a protective sleeve or scrap test is worthwhile.
A carbide-tipped stop countersink can help produce consistent screw seats, but the right choice depends on the material and the work. For hardwood, check that the cutting angle leaves a clean recess without tearing the grain. A sharp tool and a firm clamp matter. For aluminum or other soft metals, use a suitable cutting fluid and clear chips often; packed chips can scratch the surface or overheat the cutter.
Match the pilot hole and countersink geometry to the fastener. The screw head should sit flush without needing extra pressure. A depth stop is useful when several parts need the same recess, yet it must be adjusted on a test piece first. Small differences in material thickness can change the result. Measure twice.
In a busy workshop, consider shank compatibility, tool access, and how easily the stop can be reset. Carbide tips tend to resist wear in abrasive materials, though they can chip if the tool is dropped or fed aggressively. Use a rigid drill or machine setup, moderate speed, and steady pressure. Listen for chatter. If the cut looks rough, stop and inspect the edge rather than forcing it. One detail is easy to overlook: a stop that works well on flat stock may not sit evenly on a curved surface.
| Selection | Best Fit | Typical Included Angle | Why Choose a Carbide-Tipped Cutter | Stop and Pilot Considerations | Buying Check |
|---|---|---|---|---|---|
| 1. General-purpose adjustable-stop countersink | Mixed workshop jobs in aluminum, plastics, and mild steel | 90° is a common general-purpose choice; match the angle to the fastener head | Carbide cutting edges can retain hardness at elevated cutting temperatures and resist wear in abrasive work. | Choose an adjustable stop that locks securely; select a pilot suited to the hole and fastener system. | Check shank diameter, cutter range, stop adjustment range, and whether the pilot is included or sold separately. |
| 2. 82° countersink for inch-series flat-head screws | Assemblies using flat-head screws designed for an 82° seat | 82° | Useful where repeatable seats are required across multiple parts, especially when cutting abrasive or harder materials. | Set the stop using a test piece; a pilot helps guide the tool and maintain alignment. | Confirm the screw specification calls for an 82° seat; do not assume all flat-head screws use the same angle. |
| 3. 90° countersink for metric fastener seats | Many metric flat-head screw applications and general chamfering | 90° | A carbide tip is a practical option for production work where tool life and consistent cutting are priorities. | Match the pilot diameter to the drilled hole and fastener arrangement; verify that the stop leaves the required seat depth. | Check the drawing or fastener standard for the specified included angle and countersink diameter. |
| 4. 100° countersink for thin-sheet applications | Thin sheet-metal work where a 100° fastener seat is specified | 100° | Carbide-tipped cutters can be helpful when repeated cuts or abrasive work would wear a conventional cutting edge quickly. | Use a fine, controlled feed and a carefully set stop to avoid removing excess material from thin stock. | Verify the required fastener angle and material thickness before selecting the cutter diameter. |
| 5. Countersink for glass-fiber-reinforced plastics | Fiberglass and other abrasive fiber-reinforced composite panels | Choose the angle required by the fastener or drawing | Carbide is often selected for abrasive composites because the reinforcing fibers can wear cutting edges rapidly. | A rigid setup, sharp cutter, and light feed help reduce heat and edge damage; use dust control appropriate to the material. | Check that the tool is suitable for the work material and follow the composite maker’s guidance for machining and dust protection. |
| 6. Countersink for hard or abrasive nonferrous materials | Production work in materials such as silicon-rich aluminum alloys or abrasive nonferrous stock | Match the angle to the fastener seat | Carbide can offer greater wear resistance than many high-speed-steel cutters in abrasive cutting conditions. | Use a stable machine setup and suitable cutting conditions; a stop supports repeatable depth but does not replace correct feeds. | Confirm workpiece alloy, cutter geometry, and compatibility with the machine’s speed and holding system. |
| 7. Countersink for deburring and edge finishing | Light deburring, edge breaking, or repeatable shallow chamfers | 90° or another angle suited to the required chamfer | A wear-resistant cutting edge can be useful when the tool is used repeatedly on production parts. | Set the stop for a shallow cut and test on scrap; avoid forcing the cutter, especially on thin or soft materials. | Look for a stop that is easy to adjust and lock, and a cutter size appropriate for the intended chamfer. |
Selection note: “Best fit” describes an application category, not a specific model. Countersink angles, pilot sizes, cutter diameters, and stop ranges vary by tool. Confirm the fastener specification, workpiece material, machine setup, and tool maker’s instructions before use.
Match its included angle and diameter to the fastener and drawing. Check shank fit, stop adjustment, and whether the collar locks firmly.
A fixed stop suits repeated holes with the same depth. An adjustable collar handles varying material thicknesses, but lock it carefully.
For hardwood, look for a clean seat without torn grain. In soft metals, clear chips often and use suitable cutting fluid.
They can resist wear in abrasive materials, but they can still chip. A dropped tool or aggressive feed can damage the edge.
Set the stop on a test piece, then check the first holes with a depth gauge or sample screw. Small thickness changes matter.
Single-flute cutters may clear chips cleanly. Multi-flute cutters can cut evenly, but packed chips may clog the flutes.
Use a rigid setup, steady pressure, and a sensible feed rate. Listen for chatter. Stop if the cut looks rough.
It can mark soft surfaces, and it may sit unevenly on curved stock. A protective sleeve helps, though I would still test it on scrap.
Carbide Tipped Stop Countersinks are designed to create clean, consistent countersinks while helping control hole depth and shape. Their carbide cutting edges offer durability for repeated use, while the stop mechanism limits how far the tool cuts. Understanding how these features work can help buyers select a tool that produces uniform results and reduces the risk of over-cutting.
This guide compares seven countersinks by their design and intended use, then explains the factors to consider before buying, including cutting performance, stop adjustment, compatibility, and ease of handling. It also explores how material type, hole requirements, and workshop workload influence the best choice. By weighing these considerations, buyers can match a countersink to their projects and working conditions with greater confidence.